The Context Graph Paradox: When More Data Makes AI Agents Worse
Discover why context graphs fail at scale and how semantic structure delivers reliable runtime context for enterprise AI agents.
By Nexla Team
Introducing ![]() Express — Go from prompt to pipeline in minutes.
Express — Go from prompt to pipeline in minutes.
When data is collected from a variety of sources, it arrives in different formats, with different labels and under different categories. Non-technical data users are dependent on data engineers to standardize and deliver the data they need, causing bottlenecks and increasing the workload of data engineers while delaying the potential value of data.
Having a way for users to access, transform, and deliver the data they need, in a format they can use, reduces the workload on data engineers while providing better data quality and more personalized experience for data users. This automation of data delivery is a low/no-code way to deliver accurate data in the correct format where it is needed without the bottleneck of a data engineering team.
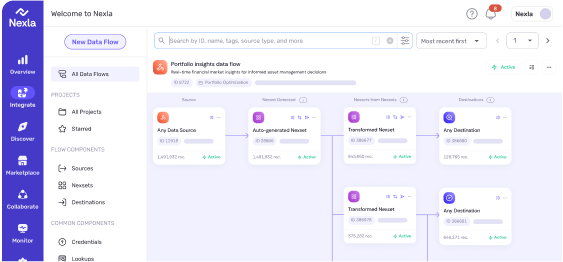
Using rules to automatically transform and standardize data is essential to making data ready to use. The Nexset Designer tool is used to design transformations of incoming data to create new Nexsets, making data transformations and management easy and allows users to easily visualize how their data transformations work.
The Nexset Rules panel is where transformation rules, validations, default values, record filters, annotations, and custom transform code can be entered to configure a Nexset transformation. It is located in the middle of the Nexset Designer screen.
![]()
To create a new Nexset transformation rule, click the Add Rule Group button in the Nexset Rules panel. This will open a menu allowing users to select the type of rule group to add.
![]()
Transform
This option creates a new Transform rule using one of the pre-built transforms included in Nexla. Use the Function menu to select the desired transform rule, and enter the required information in the associated pulldown menus and text fields.
![]()
Transform: Code
This option allows users to enter custom or reused transformation code. Use the pulldown menu at the top to select from Python, JavaScript, or JSON to enter the desired custom transform code.
![]()
Transform: Replicate
This option is only available if no changes have been made to the input Nexset with other rule types. It creates a Replicate transform rule that passes all data contained in the input Nexset directly to the output Nexset without any transformations.
![]()
Default Values
This option creates a new Default Value rule that allows users to specify default values for input Nexset attributes. Use the pulldown menu on the left to select the attribute for which a default value should be set, and use the second menu to select the type of default value to apply—a null value, string, or number. Then, use the text field that appears to enter the desired default value.
![]()
Record Filters
This option creates a new Record Filter rule that allows users to filter Nexset output values based on the values of input Nexset attributes. Use the pulldown menu on the left to select the attribute to which the filter should be applied, and use the menu next to it to select the desired filter type. For some filters, an additional menu and/or text field will appear to specify the associated parameters.
![]()
Validations
This option creates a new Validation rule group. By default, the type of rule added is a Required Attribute validation. Click on the text field to enter the desired attribute or select it from the menu that appears. To add another type of validation rule, click at the bottom of the rule group, and select the desired validation type from the menu that appears.
![]() Annotations
Annotations
This option allows users to enter descriptive annotations of output Nexset attributes. Use the menu at the top to select the desired output attribute, and enter the annotation in the Description text field.
![]()
To access the Nexset Designer, click on the Transform icon on any Nexset to begin setting up a transformation.
![]()
This will open the Nexset Designer Panel.
![]()
Let’s walk through making customer data standardized. In this example, we’ll make the customer’s first and last name be in uppercase, add the email address, and then hide their credit card information to create a contact list.
Once a rule has transformed data, the data is encapsulated into a new Nexset. To change the rules or modifications, you can either start again and apply the same rules with your new changes, or you can further modify the Nexset previously created. Say, for example, that the emails need to be in all lowercase instead of maintaining them as entered. Simply select the new Nexset from your flow:
![]() Set the new rule, then click Run Nexset Rules, then Save and Exit. The new Nexset generated includes the updated modifications.
Set the new rule, then click Run Nexset Rules, then Save and Exit. The new Nexset generated includes the updated modifications.
![]()
As automating data engineering becomes more and more important to lower work loads for data engineers and speed up data integration, being able to set up and apply rules with a low/no-code interface is a necessity. Besides ensuring data quality and speeding up data integration, rules that can be applied and modified allow for personalized data experiences that deliver data in the format needed without overloading data engineering teams.
If you’re ready to let data users transform their own data, get a demo or book your free data solution consultation today and learn how much more your data can do when everyone has access to the data they need. For more on data, check out the other articles on Nexla’s blog.
Discover why context graphs fail at scale and how semantic structure delivers reliable runtime context for enterprise AI agents.
Enterprise AI agents fail when the context behind their decisions is incomplete, stale, or conflicting. Context engineering ensures agents receive accurate, permission-aware runtime context for reliable decisions.
Explore how a multimodal AI pipeline built with NVIDIA models, Nebius infrastructure, and Nexla orchestration converts social media travel videos into structured itineraries.